Showing posts with label Everybody Likes Sandwiches. Show all posts

My Favorite Salad Dressing of the Moment: Creamy Tarragon Dijon Vinaigrette

By Jeannette Ordas of Everybody likes Sandwiches


Sometimes you have to clarify these things. I love eating salads and I make homemade dressings all the time, so I'm always coming up with a favorite combination. Right now, though, this is The One. It's got everything I love: the bright tang of lemon, the herbal goodness from some fancy tarragon dijon mustard and a good dose of creaminess thanks to a dollop of mayonnaise. And of course, lots of garlic. This is something you make with good friends and share with good kissers.
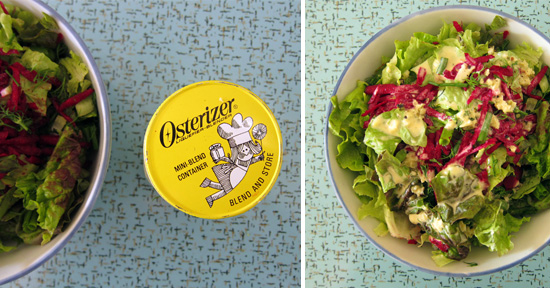

Normally, I tend to shy away from mayo-based dressings, but when our jar was almost finished I shook up the rest of the mayo along with some standard vinaigrette ingredients. The results were delicious and I've been shaking up a batch every week now. Salad greens from our CSA get tossed with a variety of local vegetables and sometimes a boiled egg. Lunch, there it is! Part of a dinner plate? Yes, please! Fill up on your greens and pour on this dressing because things are going to get addictive.

Can't find tarragon dijon? Just use regular dijon mustard and add in some fresh herbs - whatever you have around. May I suggest tarragon? Though I also think dill would be excellent too.


Creamy Tarragon Dijon Vinaigrette
2 tablespoons extra virgin olive oil
1 large tablespoon of mayonnaise
1 large teaspoon of tarragon dijon
juice of 1 lemon
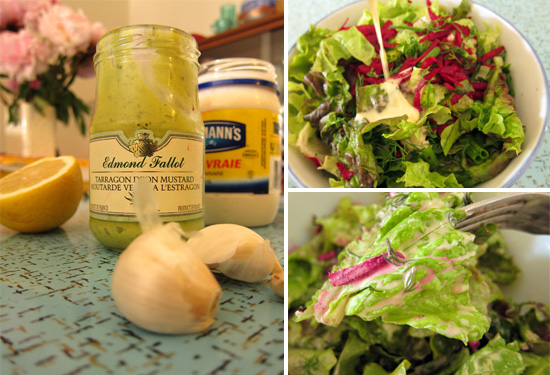
1 really fat clove of garlic, minced
1/2 teaspoon honey or agave syrup
1 large pinch of kosher salt
a good grind of black pepper

Combine all the ingredients in a small jar with a tightly fitting lid. Shake, shake, shake! Give it a taste. Does it need more salt? Lemon? Honey? Or maybe it's a bit thick. If so, add in a teaspoon of water and shake again. Pour over your favorite salad.

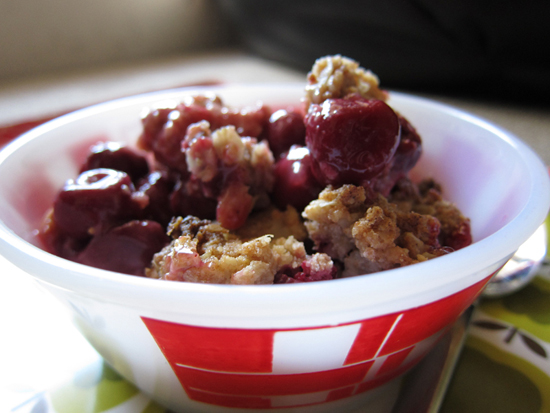
Swoon-Worthy Summer Dessert: Cherry Pear Crumble

By Jeannette Ordas of Everybody likes Sandwiches


A crumble is probably the easiest way to gussy up summer fruits into a something comfortable and elegant. Pies can seem like too much effort, but a crumble is a cinch to prepare. But before you begin your own crumble journey, I have two tips for making perfect crumbles and crisps.

Tip One, use 2 or 3 fruits max. A one fruit crumble is fine and all, but four is overly complicated. I like using 2 or 3 fruits best. Think popular favorites like strawberry + rhubarb, apple + cranberry, or just try out your own delicious fruit combo.


Tip Two, large crumbles take the cake! One of the real joys of eating crumble is all of that delicious topping - and to make a good crumb you need butter, lots of it. You can get away with a smaller amount, but you'll get something more powdery and lackluster. Big, crunchy balls of crumble is the ideal - so get your mix to a dough-like consistency and then crumble it in big chunks over the top of your fruit.

I used fresh sour cherries here, but Bing or Rainier or any cherry that's ripe now is suitable. I had a couple pears to use up so in those went, but I think nectarines or peaches would be totally swoon-worthy companions to the cherries as well. Serve with ice cream or yogurt if desired.


Cherry Pear Crumble
4 cups cherries, pitted
2-3 pears, peeled, cored & diced
1/4 cup sugar
3 tablespoons cornstarch
1/2 teaspoon almond extract
pinch nutmeg
1 teaspoon lemon juice

topping:
3/4 cup flour
1/2 cup whole oats
1/3 cup brown sugar
1/2 teaspoon salt
1/2 cup cold butter, cubed
1 teaspoon cinnamon

Preheat oven to 375F. Add the cherries and pears to a casserole pan or deep pie dish, tossing with the sugar, cornstarch, extract and nutmeg. Pour in lemon juice and stir to combine. Set aside.

In a small bowl combine all the topping ingredients and use your hands to work in the cold butter into doughy clumps. Scatter the topping evenly over the fruit. Bake for 45 minutes until the topping is golden and the fruit have created a bubbly sauce. Cool slightly and serve.

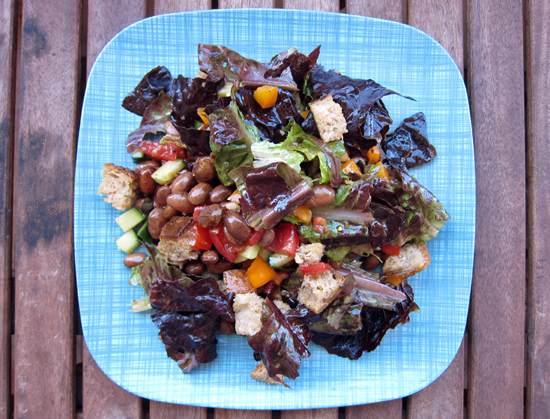
Summer on a Plate: Panzanella Salad with Beans

By Jeannette Ordas of Everybody likes Sandwiches


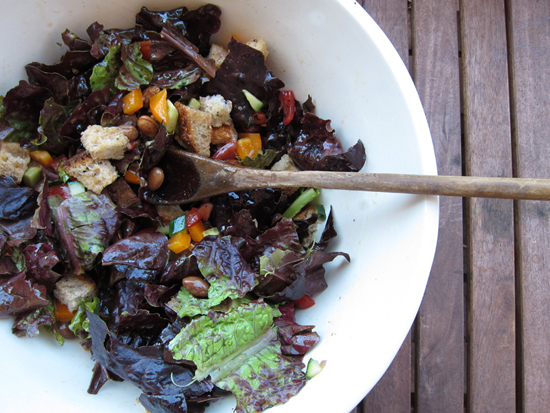
I discovered panzanella salad last summer and was instantly in love. It's filling, versatile, and it's beautiful on a plate. This traditional Italian salad is meant for summer when tomatoes are at their peak, so don't even try to attempt this with less-than-stellar tomatoes or you'll be disappointed with the results.


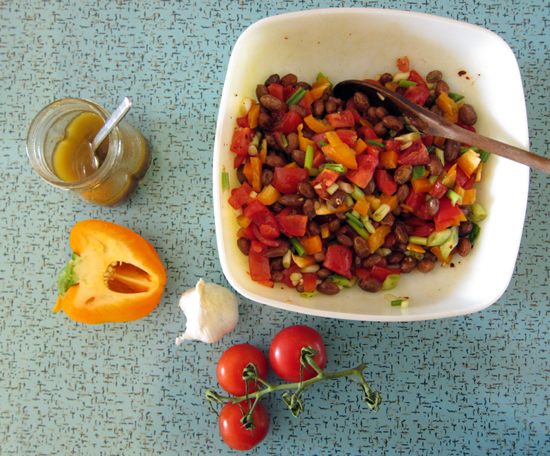
For this version, I used the green onions and red leaf lettuce from our CSA (community sponsored agriculture) share along with some market fresh vegetables and a day old loaf of multi-grain bread from our local bakery. The beans I added as an afterthought since I had just cooked some up the night before, but it was a great call. A hearty and filling salad? Totally! And it's vegan too, so it's a win.


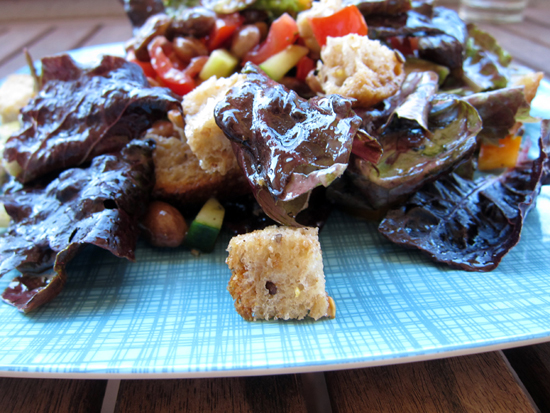
The only trick with this salad is to make what you will eat for that meal because leftovers turn soggy quickly. What I like to do is prepare the dressing ahead - often making a double batch so that I can make this salad quickly whenever the urge strikes. And trust me, the urge will be often. Is it embarrassing that I ate this 3 days in a row? It's that good.


Panzanella Salad with Beans
1/2 cucumber, diced
1 yellow pepper, diced
4 green onions, sliced on the diagonal
4-6 small tomatoes, seeded & diced
1 cup cooked beans

1/2 cup olive oil
1/3 cup balsamic vinegar
1 large clove garlic, minced
1/4 t kosher salt
1/2 t aleppo pepper

1 head of lettuce
1 cup fresh basil, cut into a chiffonade
1/2 loaf of day-old peasant bread, cubed

In a large bowl, combine the first 6 ingredients in a bowl.

In a small jar, give the next 5 ingredients a good shake. Pour the dressing over top of the vegetable/bean mixture and let flavors mingle for 10 minutes.

Toss in the lettuce, basil and bread. Give everything a good toss and serve immediately.

Sweet Summer: Mexican Corn

By Jeannette Ordas of Everybody likes Sandwiches


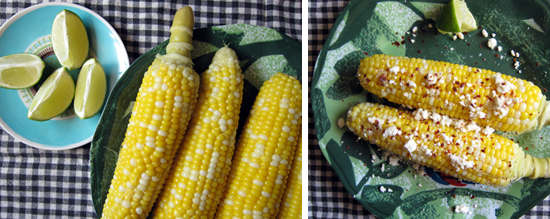
Growing up I only knew of one way to eat corn on the cob - salt and butter and lots of it. Sure, drippy butter on fresh sweet corn is a fantastic pairing, but a few years ago I started skipping the butter and just kept the flakey kosher salt and I never missed a thing.


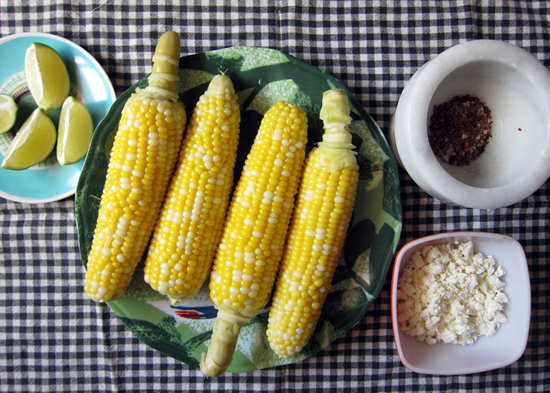
But this year, I have a new tradition: Mexican corn. When I was in NYC earlier this summer, I ate a grilled cob covered in lime, salt, chili flakes and cheese at the Brooklyn Flea. It was love at first bite. So when I spotted some corn at a local market, I let my new instincts take over.


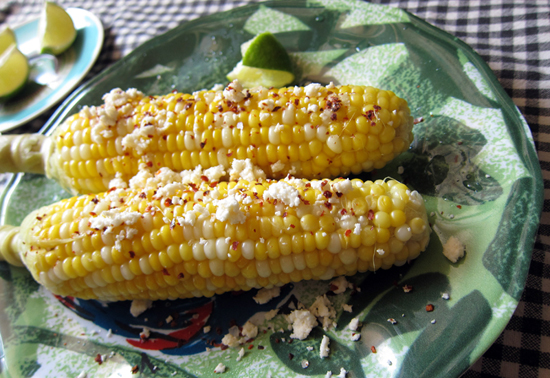
Traditional Mexican corn is called Elote and fresh corn is spread with mayonnaise and then sprinkled with cotija cheese. While I'm fine with mayo, I wanted to keep this corn light and bright, so I skipped that along with the butter and the results were super tasty. I couldn't find cotija cheese, so I used crumbled feta but grated Parmesan cheese also is mighty tasty too. Next time, I'll skip the cheese and take the more puritan route of the lime juice-chili-salt sprinkles, but that's just me.

Lime, corn, salt and chili totally screams of summer. Get your backyard grill going and grill the corn in their husks or just steam the cobs like I did and enjoy summer at its sweetest.


Mexican Corn
4 cobs of corn
1 lime, cut into quarters
1 teaspoon aleppo pepper (or cayenne or crushed chili flakes)
1 teaspoon kosher salt
4 tablespoons crumbled cotija cheese, feta or grated parmesan (optional)

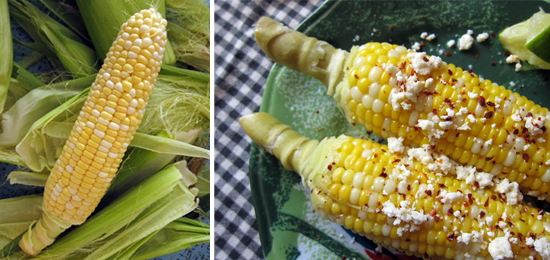
Shuck corn and place in a large pot and cover halfway with cold water. Once the water has boiled, the corn is ready. Briefly rinse under cold water until it cools down enough to handle.

Squeeze lime juice all over your corn cob and sprinkle with salt and aleppo pepper. I like to blend the salt and aleppo pepper together and put into a small bowl, so it's ready mixed and ready to sprinkle. Dribble some cheese over top and start chewing.

..........................................

Vancouverite, foodie, crafty, freelance designer, Jeannette Ordas from the popular food blog, Everybody Likes Sandwiches joins us every Wednesday enticing us with her hearty and simple recipes!

A Strange Beauty: The Last Word Cocktail

By Jeannette Ordas of Everybody likes Sandwiches

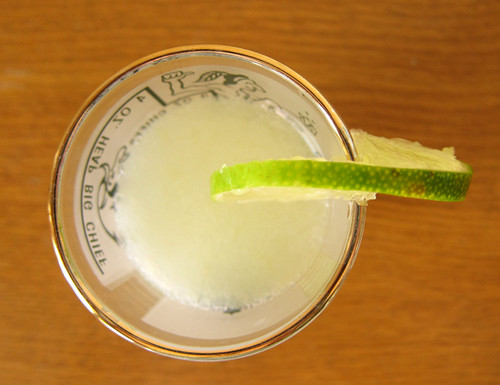
Summer is often a time for punches, Pimm's or a beer on a sunny patio. But for those cooler summer evenings, this green-hued cocktail is a lovely way to imbibe.

The Last Word is a prohibition-era cocktail that combines gin, green chartreuse and maraschino liqueur into a drink that is strangely delicious. It's got a strong herbal kick from the chartreuse which contains 132 different herbal extracts (!!) but its bitterness is tamed by the sweetness of the maraschino and the floral notes in the gin. The fresh lime juice adds bite.

The Last Word is a sweet-tart cocktail that is as intriguing as it is delicious. And because the drink is made with 4 ingredients of equal proportions, it's an easy recipe to remember. Bottoms up!


The Last Word
1/2 oz gin
1/2 oz green chartreuse
1/2 oz maraschino liqueur
1/2 oz fresh lime juice
ice

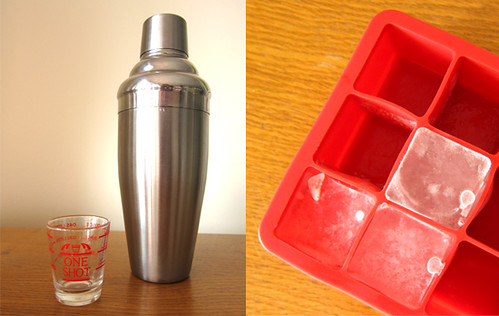
Combine all ingredients into a cocktail shaker. Shake well until frosty and strain into a martini glass (or your favorite vintage glass). Drink up.

(Sp)icy Cool: Mexican Chocolate Ice Cream

By Jeannette Ordas of Everybody likes Sandwiches


Having just returned from a 3 week holiday, the first thing I wanted when I returned home was ice cream - I obviously did not get my fill in NYC! I had been browsing through a new cookbook when I stumbled upon an easy recipe for Mexican chocolate ice cream. The amazing thing about the recipe was that it didn't call for eggs or cream or even cornstarch as a thickener. It was straightforward as all get out and I was intrigued by its simplicity.


A few years ago, finding Mexican chocolate was a bit difficult in Vancouver, but now (maybe because I know where to look), it's available in a few stores around town (I get mine at the Gourmet Warehouse). Mexican chocolate comes in round hard tablets and is quite granular because of the added sugar. It tastes of cinnamon but sometimes there are other spices included as well - nutmeg and all-spice are common. In Mexico, these tablets are often used to make hot chocolate and when I first started buying Ibarra chocolate (the brand I can find most easily here in Vancouver) it was just for that purpose. I've since branched out and use it in savory chilis and baking.


The resulting ice cream was silky smooth and sweet but not cloying. Really, how can you go wrong with cinnamon and chocolate? I think if you wanted to up the ante, adding in a spoonful of aleppo pepper or a pinch of cayenne would work well for a spicy version. If you can't find Mexican chocolate, use good dark chocolate instead and simmer it with a stick or two of cinnamon and maybe some all-spice pods or a pinch of nutmeg. Discard the spices when the mixture has cooled.


Mexican Chocolate Ice Cream
(adapted from Heart of the Artichoke by David Tanis)

8 oz Mexican chocolate (equals 2 discs of Mexican chocolate + about 1/4 cup dark chocolate chips)*
1 teaspoon organic ground cinnamon
1/2 cup organic sugar
1/2 teaspoon salt
3 cups whole milk (3.25% homogenized)

Chop the Mexican chocolate as finely as you can and dump it into a medium saucepan, along with the cinnamon, sugar and salt. Pour in the milk and warm until everything is well dissolved, whisking occasionally. Strain the liquid to remove any solids and let the chocolate mixture cool. Place in the fridge for 4 hours or overnight.

Churn the mixture in your ice cream maker for about 20-25 minutes and then transfer to a lidded container to freeze.

* I found that 2 discs of Mexican chocolate was just shy of 8oz so I topped up to 8oz with some dark chocolate chips rather than chopping up another disc.

Keep it Simple: Tomato and Basil Pizza

By Jeannette Ordas of Everybody likes Sandwiches


When I make pizza, I love trying out usual combinations - remember the peach and escarole pizza or the one with hummus and vegetables? Well, sometimes I like to also go the classic route and keep things traditional.


This is the pizza you make when tomatoes are at their finest: fresh, ripe and bright red. Fresh basil from the market or your backyard garden if you've got the green thumb for it (sadly, I don't). I use green onions here, but fresh garlic would also be brilliant. Soft, fresh mozzarella would be nice if you've got it, but plain old party skimmed mozz works for me. Instead of a tomato sauce to cover the whole thing, I just spread over a little olive oil over the dough for a more rustic touch. Flakey salt and some freshly ground black pepper and that's about it. Simple and easy.


Tomato and Basil Pizza
your favorite pizza dough (homemade or fresh from a bakery/market)
2 T cornmeal
3 T olive oil
4-6 ripe tomatoes, roughly chopped
1/2 bunch of basil, torn to bits
4 green onions, sliced
flaky kosher salt & freshly ground pepper
1 cup mozzarella, cut into small chunks

Preheat oven to 425F. After your pizza dough has risen, use 1 tablespoon of olive oil to grease up a walled cookie sheet. I use my hands for this. Sprinkle sheet with cornmeal and then push out or roll out your pizza dough until it spreads to all 4 corners. Spread the remaining olive oil over top.

Evenly scatter the tomatoes, basil and green onions over the top of the dough. Sprinkle with salt and a few good hefty grinds of black pepper. Add mozzarella over top and place in oven and heat for about 15-20 minutes or until the cheese gets bubbly and the crust becomes golden. Slice and eat hot.

..........................................


Vancouverite, foodie, crafty, freelance designer, Jeannette Ordas from the popular food blog, Everybody Likes Sandwiches joins us every Wednesday enticing us with her hearty and simple recipes!

New Breakfast Tradition: Cardamom Oat Waffles

By Jeannette Ordas of Everybody likes Sandwiches


I'm a big fan of waffles for breakfast. I'm also in love with oatmeal so when the two are combined, I'm a very happy camper. One waffle recipe in my repertoire that I make whenever I need a hearty breakfast is packed with oatmeal, flaxmeal and whole wheat flour. It's delicious and healthy but it's a powerhouse of a waffle: just one is enough to stuff your belly and power you through until lunchtime strikes.


This recipe is a bit lighter, but it still uses the best elements of the aforementioned waffle. Hints of cardamom, cinnamon and nutmeg make friends with the oats and I use coconut oil for kicks (but melted butter or plain old canola oil would be fine substitutions too). Top with fresh fruit, yogurt and maple syrup and I think we've got a fine new waffle tradition here!


Cardamom Oat Waffles
1 1/2 cup all-purpose flour
1 cup organic large-flake oats
1 tablespoon baking powder
1 tablespoon brown sugar
1/2 teaspoon ground cardamom
1/2 teaspoon ground cinnamon
1/4 teaspoon salt
a pinch of ground nutmeg
1 cup yogurt
1/2 cup skim milk
2 large eggs, beaten
2 tablespoons coconut oil, melted (melted butter or oil will work)

In a large mixing bowl, combine the flour, oats, baking powder, brown sugar, salt and spices together until well blended. In a smaller bowl, whisk the skim milk, yogurt, eggs and coconut oil. Pour the wet ingredients into the dry and lightly stir until mixed. Let mixture sit for 5 minutes.

Drop spoonfuls of the batter into the centre of a heated and lightly greased waffle iron and bake until golden brown. Top with maple syrup and fresh fruit.

..........................................


Vancouverite, foodie, crafty, freelance designer, Jeannette Ordas from the popular food blog, Everybody Likes Sandwiches joins us every Wednesday enticing us with her hearty and simple recipes!

Pantry Basics: Curried Couscous and Red Lentil Salad

By Jeannette Ordas of Everybody likes Sandwiches


I'm not sure if I'm a victim of bad planning, but I'm often left with a bare cupboard and only a few things left in the crisper. When faced with limited choices in the kitchen, some call for take-out immediately. Not me. I like to see if I can still be inspired by the leftovers and lonely bits in my fridge and pantry. I like a challenge.

This salad is the result from one of those empty cupboard inspirations. It's a hearty lunchtime salad and could be super flexible depending on what ingredients you had on hand. I used red lentils but toothsome French green lentils or chickpeas would be nice here. Plus you could sub in any vegetables that catch your fancy. Like fresh raw spinach! Or lightly steamed cauliflower! I loved the crunch and colour of the julienned carrots and the sweetness of the red pepper.


I usually veer towards tart dressings, but felt this salad could stand up to a curry vinaigrette. The warm spiciness of the garam masala provides a nice base for the bright flavour of the lemon juice. To round out things out, a touch of agave syrup for sweetness and I punch up the heat with my favorite hot sauce, sriracha. Not too shabby for a meal when there seemed to be nothing left in the kitchen.

Curried Couscous and Red Lentil Salad
1 cup red lentils
1 bay leaf
1 cup israeli couscous
1 carrot, julienned
1 large red pepper, diced
1 stalk celery, diced
1 green onion, diced
1/4 cup olive oil
1 teaspoon garam masala curry paste (powder would be fine too)
juice of 1/2 lemon
1 teaspoon agave syrup
a few squirts of sriracha
a good pinch of kosher salt

In a medium sized saucepan, add lentils and bay leaf to cold water and bring to a boil. Turn down heat and simmer until tender but not mushy, about 10-15 minutes. Drain and discard bay leaf. At the same time, cook up the couscous according to package directions and steam until tender. Drain any water.

Meanwhile, slice and dice your vegetables and place in a medium sized bowl. When the couscous and lentils have cooked, toss with the vegetables.

Using a lidded jar, shake together the remaining ingredients and taste. Adjust seasonings if necessary and pour over the warm salad. Toss and combine well. Serve warm or cold. Makes 2 large servings or 4 side servings.

Hot Nutz: Spicy, Smokey & Sweet Glazed Almonds

By Jeannette Ordas of Everybody likes Sandwiches


Need a quick snack for your next cocktail shindig? These glazed almonds are perfect! I dunno know about you, but I love anything with these kind of strong contrasting flavours. Hot? You bet! Seriously smokey from the chipotle. Sweet from the agave syrup - but I'm sure honey would be a fine option too. Plus, a good salty balance which is a requirement for snack time. And there's cinnamon and hot sauce to help bump up the goodness.


They are quick and easy to make so they are perfect for last minute guests or wonderful tossed in a salad. They are shiny from their short trip in the oven and once they cool they have a hard and shellacked shell. However, don't leave these out overnight as they shell does tend to get sticky after awhile. So gobble these up with your next round of cocktails or save any leftovers in a air-tight container.


Spicy, Smokey & Sweet Glazed Almonds
2 cups raw almonds
1/4 cup agave syrup
a few good shakes of your favorite hot sauce
1/2 teaspoon cinnamon
1/2 teaspoon chipotle powder
3/4 teaspoon salt

Preheat oven to 300F. Toast almonds for 5 minutes in the oven. Meanwhile, in a small saucepan, heat the agave, hot sauce, chipotle and salt together over medium heat. Remove the almonds from the oven and add into the saucepan. Toss until the almonds are well coated with the agave mixture and let the mixture bubble away a bit until the mixture is somewhat absorbed, about 5 minutes.

Line a cookie sheet with parchment paper or silpat and carefully pour the almonds in an even layer. Bake for 10 minutes, checking on them frequently until they turn a dark reddish brown. They burn quickly so keep an eye out. Let cool completely - about 15 minutes - and then start snacking. Best the day they are made, or store in a tightly lidded container & store in a cool dry place.

Old Age: Root & Ginger

By Jeannette Ordas of Everybody likes Sandwiches


Last year I took a little vacation to San Francisco and brought back with me a bottle of Root that I found at a specialty liquor store. Root is a Philadelphia liqueur brewed by Art in the Age, an artist collective that believes in "high quality work marked by fine craft and intellectual rigor". For a bit of history, root tea was made by Native Americans and the recipe was passed along to early American settlers. It had kick but when the Temperance Movement gained popularity and wanted to keep coal miners sober on the job, the non-alcoholic root beer we know today was born. Art in the Age wanted to go back and create a recipe based on the historical bevy and thus Root was born.


It's a blend of birch bark, wintergreen sugarcane, sassafras and a bunch of other wild roots and herbs. It's 80 proof and organic and has nothing in common with those sickly sweet root beer flavoured vodkas that are around today. While their website has a variety of recipes you can make, I've found the one that I like the best. Root and ginger. I used Fentimans ginger ale here, but good old Canada Dry also makes for a perfect summer sipper. But remember, this packs a powerful punch, so sip carefully!


Root and Ginger
2 oz Root
4 oz Ginger Beer
ice
lime wedge (optional)

Pour Root over ice and top with ginger beer. Stir. Garnish with a lime wedge, if desired.

...........................................


Vancouverite, foodie, crafty, freelance designer, Jeannette Ordas from the popular food blog, Everybody Likes Sandwiches joins us every Wednesday enticing us with her hearty and simple recipes!

Bump up Summer: Vanilla Roasted Berries

By Jeannette Ordas of Everybody likes Sandwiches


It's still not berry season here in Vancouver yet but I'm waiting patiently. But I'm not that patient...we're talking strawberries here, after all! Luckily, I still have a cache of frozen berries left over from the u-pick farm frenzy I was in last summer and I decided I'd take up the minor challenge of roasting the berries with vanilla sugar and a touch of balsamic vinegar. It seems like an odd combo until you actually try it. Slowly roasting the berries really seems to concentrate and enhance their flavour and the vinegar does the same.


Most recipes call for using fresh strawberries - or ones slightly past their prime, but I tried this with my frozen strawberries and added some frozen blackberries to the mix. It was a good move. I only roasted my berries for 20 minutes because I wanted them really juicy with lots of delicious sauce. However, if you cook them a bit longer, the liquid turns into more of a jammy consistency.


I'm not keen on adding a lot of sugar, so if you like things sweet - up the sugar to 1/4 cup or so.


Vanilla Roasted Berries
(adapted from Ina Garten)
1 pint blackberries
1 pint strawberries
3 tablespoons vanilla sugar (or more if you like things sweet)
1 teaspoon balsamic vinegar
1/2 teaspoon black pepper
1/4 teaspoon kosher salt

Preheat oven to 350F. Place berries evenly on a parchment paper-covered cookie sheet. Sprinkle with vanilla sugar, salt and pepper and balsamic vinegar. Roast in the oven for 20 minutes. Cool slightly until the juices thicken, about 5 minutes. Serve warm over ice cream, yogurt or whatever your heart desires.

...........................................

Vancouverite, foodie, crafty, freelance designer, Jeannette Ordas from the popular food blog, Everybody Likes Sandwiches joins us every Wednesday enticing us with her hearty and simple recipes!

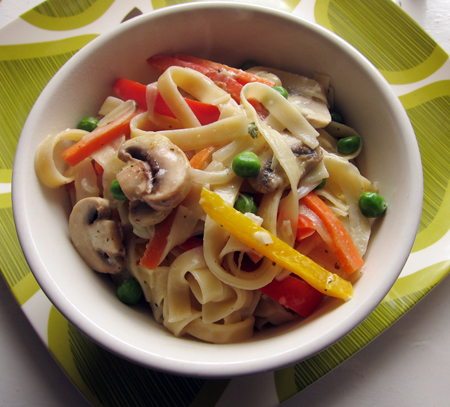
A Spring Dish: Light & Creamy Pasta Primavera

By Jeannette Ordas of Everybody likes Sandwiches


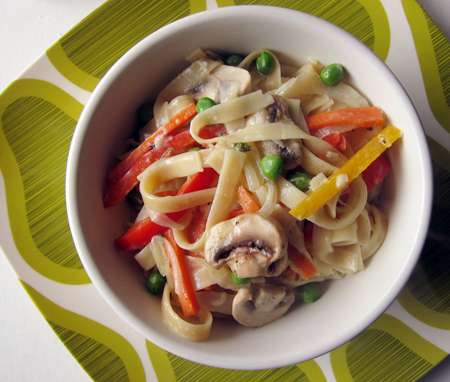
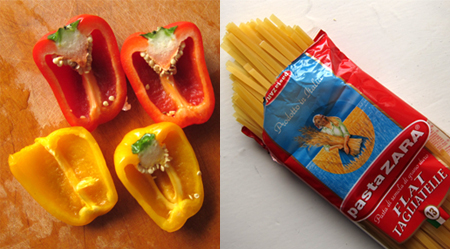
I always think of pasta primavera as an easy spring dish. Ideally you can use the freshest local produce you can find at your farmer's market. Unfortunately, we seem to be having a late spring on the west coast and there just isn't much available at the moment. So I looked around at the colourful ingredients I had at my disposal. Some tiny baby bell peppers. A vibrant carrot. A purple onion. A fragrant bunch of basil. A container of white mushrooms. Lemon juice and zest to add brightness.

I love meals like this because not only is this dish simple to prepare, but it is completely flexible in terms of ingredients. Change it up with a short pasta like rigatoni or bowties. Use lightly steamed broccoli or asparagus. Saute some sugar snap peas, watercress, zucchini or scallions. Add in shrimp or chicken. The possibilities are endless and it pretty much guarantees an easy meal that won't tire you out no matter how often you make it.

I wanted to keep this light but I still wanted a creamy texture, so I added a small amount of light cream cheese. Adding just a bit is key because this isn't a heavy, gloopy sauce we're creating. In fact, the sauce gets some of its body from the pasta cooking water. The pasta leeches out some of its starch so when you add in the cooking water it helps to thicken up the sauce without adding in flour, cornstarch or lots of cheese.


Light & Creamy Pasta Primavera
1/2 package of tagliatelle
2 tablespoons olive oil
1/4 red onion, sliced thinly
4 cloves garlic, minced
1 carrot, julienned
1/2 red pepper, sliced thinly into matchsticks
1/2 yellow pepper, sliced thinly into matchsticks
1/2 cup sliced mushrooms
1/4 cup peas, fresh or frozen
2 tablespoons light cream cheese
salt & pepper
1 tablespoons fresh lemon juice + zest of 1 lemon
1/4 cup fresh basil, thinly sliced*
grated parmesan cheese

In a large pot of salted boiling water, cook pasta until al dente, according to package instructions. Reserve about 1 cup of cooking liquid before straining.

Meanwhile, heat olive oil in a large skillet over medium heat. Saute the onions and garlic until soft, about 5 minutes. Add in the carrots and peppers and cook for another 5 minutes until tender. Stir in the mushrooms and let those sweat for a couple of minutes.

Add the pasta to the skillet along with 1/4 cup of the cooking liquid. Add in the peas and the cream cheese and toss until everything is combined. If you find the mixture too dry, add in more of the cooking liquid a little at a time. Season with salt and pepper (though remember the pasta water is already salty so taste before you add extra), add in the lemon juice, zest and basil. Toss and serve with grated parmesan cheese.

* The best way to slice basil is to roll up the leaves into a little cigar and start slicing across the width. This is called a chiffonade if you want to get fancy with your cooking terms.

Casual Elegance: Steamed Cod on Kale

By Jeannette Ordas of Everybody likes Sandwiches


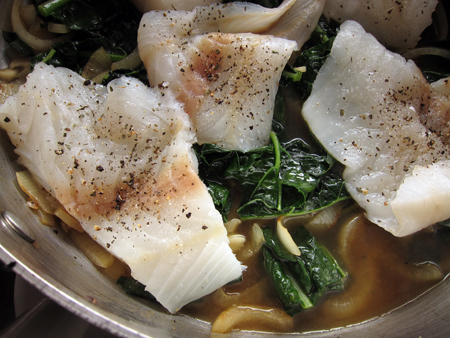
I'm always surprised that it can take very little work to put something special on the table. This meal is healthy and dead simple to prepare on a weeknight but is elegant enough to serve to guests.


Fish makes people nervous. Certainly, figuring out what fish is sustainable can be tricky. Luckily there are a couple good resources at your fingertips. Ocean Wise and Seafood Watch are two valuable sites that list which fish is best, so be sure to do your research before you hit your local fish markets. The other worry is that fish is tricky to prepare. Relax, because this dish couldn't be simpler. Really!


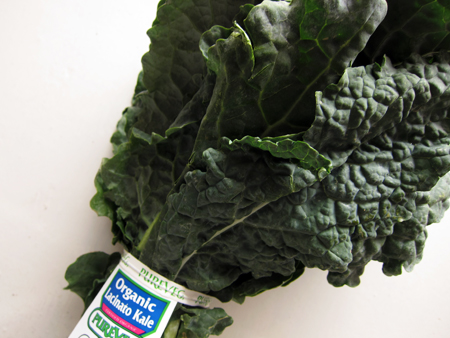
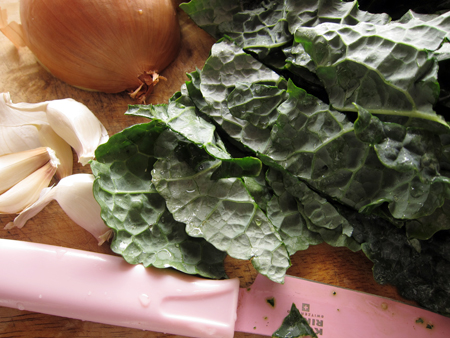
I used wild line-caught cod but any sustainable white fish fillet will do. The fish steams on a bed of greens and I used tender dinosaur kale, but curly kale or chard or even spinach would be so nice here. For the liquid, I used a mix of white wine and vegetable broth, but if all you've got is water, then go for it! The meal doesn't require a lot of prep - just chop up the onions, garlic and kale, season your fish and steam away! I served this over couscous which cooks very quickly, but roasted potatoes or rice would be fine sides as well. A fantastic dinner on the table in less than 30 minutes? Totally.


Steamed Cod on Kale
(adapted from Mark Bittman)
1 tablespoon olive oil
1/2 onion, sliced thinly
4 cloves garlic, minced
1 bunch of kale, rinsed and roughly chopped - tough stems removed
1/2 - 3/4 cup vegetable stock, fish broth, or white wine
salt & pepper
1 large line-caught cod fillet (or any other sustainable white fish of your choice)
1 tablespoon butter
1/2 lemon

Heat olive oil in a large skillet over medium heat. Add in the garlic and onions and let them sweat until they turn soft, about 5-10 minutes. Add in the kale and 1/2 cup of liquid and let simmer over low heat for a few minutes. Add more liquid, if required.

Meanwhile, season your fish with salt and pepper and slice fillet into serving-size pieces. Layer fish over the kale, cover and let steam for 5 minutes. Dot fish with butter, and re-cover until fish is fully cooked - another 2-5 minutes more. Squeeze lemon over top of fish and serve over rice, couscous or your favorite grain.

Instantly Summer: Easy Berry Yogurt Muffins

By Jeannette Ordas of Everybody likes Sandwiches


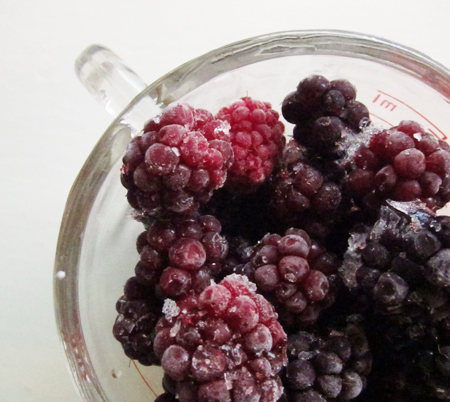
Spring is here and that means that fresh berry season is just a couple of months away! So in the meantime, I've got to clear my freezer of all my stored frozen berries from last summer. It's a tough job, but somebody has to do it.

For these muffins, I used a container of tayberries that I picked from a local farm last summer. Tayberries are a blackberry/raspberry cross and they have a sweet, perfumey bite that contrasts nicely with their tartness. Raspberries, blackberries or even blueberries, frozen or fresh, can be easily substituted.


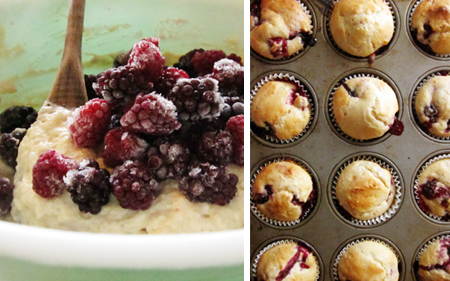
I made this batch early in the morning before my morning coffee and because I was still half-asleep, I forgot to add in the oil. Mistakes happen and luckily, these muffins still tasted delicious. They didn't peel off from the paper liners very easily and I pulled them out of the oven a few minutes early to prevent them from drying out. However, stick with the oil or butter and you'll be very happy with the results. If you want to try a more low fat option, you could certainly sub in some mashed banana and grease up your muffin tins instead of using paper liners. If you try the banana option, let me know how it goes!


We ate these warm from the oven and I loved how the juicy and jammy the hot berries tasted. It was like an instant summer reminder and it made me excited for the months ahead.

Easy Berry Yogurt Muffins
1 1/2 cup flour
1 teaspoon baking powder
1/2 teaspoon salt
1/2 cup brown sugar, packed
4 tablespoons melted butter or oil
1 large egg
3/4 cup plain yogurt
2 tablespoons milk
1 teaspoon vanilla
1 cup blackberries, frozen or fresh

Preheat oven to 400F. Line muffin tin with 12 paper cups.

In a large bowl, mix together the flour, baking powder, salt and brown sugar. In another bowl, combine the melted butter, egg, yogurt, milk and vanilla until well mixed. Pour the wet ingredients into the dry and gently stir. Add in the blackberries and stir until just combined.

Spoon batter into paper cups and bake for about 20 minutes or until the tops are lightly golden. Cool slightly, but these are best served warm, fresh from the oven.
My Zimbio
Top Stories My Ping in TotalPing.com